I'm moving... My blog that is!


Hi Everyone,

You've probably noticed that I've been a little quiet the past 2 weeks with my blog posts.  Well, part of that is because I've been in the process of moving my blog to a wordpress platform for blogging.  I've pretty much completed the move and now it is time to pass the word.

If you've enjoyed receiving my blog posts and seeing my latest projects, you'll now need to go to my new blog which is still www.sunnygirlscraps.com and sign up to receive either blog updates or the feed for the new blog.

I hope to see you over at my "new" blog!  I'm getting ready to post a special along with some blog candy for the "big" launch of my revamped blog.

Sunny Stampin' & Scrappin'!

Pam Staples

Ah-Choo! Gesundheit!


Kleenex Box Makeover!


Goodness, can you believe how ugly those Kleenex boxes are?  You go to the store needing kleenex tissue and all they have is some hideous design that clashes with your home decor!  What to do!  You need those tissues but you hate the box...


Well, here is a great solution!  Make your own Kleenex Box Cover to match your home decor or at least something that is way cuter than that ugly kleenex box design.  Today's share brings you this classic tissue box cover sporting the Eiffel Tower from one of my favorite stamp sets - Artistic Etchings.  


This is my very first tissue box cover and I used this tutorial from splitcoaststampers.  I don't own any nestabilities and instead used my Circle Scissor Cutter to create the first opening for the top of the box then I "folded" the decorative top piece in half but didn't "crease" the paper and used a punch to make my opening for the tissue paper.


SunnyGirlScraps Tip(s) of the day:
  • Have you seen a Definitely Decorative Stampin' Up! Home Decor catalog lately?  The Decor Elements are an excellent way to add dimension and character to your walls or other home furnishings such as plates, mugs, platters, mirrors or frames.
  • Photography Tip for Beginners - Keep a camera with you all the time and I don't mean the camera built into your cell phone regardless of how good that camera may or may not be!
  • Photography Tip for Beginners - Make a list of the shots you would like to capture with your camera.  I've always wanted to capture a butterfly on a flower and while on vacation recently I was able to capture this photo:

Like this project?  Please share your thoughts or questions by leaving me a comment below.  I love hearing from all my readers and also encourage you to share my blog with your friends - word of mouth is one of the greatest forms of flattery.

To purchase supplies for this project, click 
HERE or email me at sunnygirlscraps@gmail.com!  
Do you enjoy making similar handcrafted items?  Not a Stampin' Up! Demonstrator?  Now is a great time to think about becoming a Stampin' Up! Demonstrator.  Starting on November 15th until November 30th, purchase the Starter Kit OR Digital+ Starter Kit for 50% off during the Simply Amazing Stampin' Up! Starter Kit Promotion which includes FREE SHIPPING.  

To sign up as a demonstrator and join my team, click HERE!

My recruit password is:  SUNNYGIRL

Sunny Stampin' & Scrappin'!

Pam Staples


Project Supply List:


Ink:  Basic Black (101179), Riding Hood Red (111836)


Cardstock: Riding Hood Red (111348), Very Vanilla (101650), Basic Black (121045)


Designer Series Paper:  Love Letter (117162)


Accessories: Antique Brads (117273), Paper Daisies (119243), 5/8" Satin Ribbon - Very Vanilla (117291), Smooch Spritz - Gold Glow (118770)


Tools:  Distressing Essentials Kit (118762), Circle Scissor Plus (112530), Glass Mat (112531), 2 x 1 3/8" XL Oval Punch (119859), Scallop Trim Border (118402), Big Shot (113439), Texturz Plates - Backgrounds 1 (114512)


Stamp Sets:  En Francais (109521), Artistic Etchings (w: 118517; c: 120573)
Artistic Etchings
En Francais


Christmas Tags


Glittery Sparkling Fun!


Have you noticed how Christmas just sparkles?  When I look around at all the ornaments, wrapping paper and decorations for Christmas I find lots of glittery, sparkling fun!  There is the tinsel on the tree and twinkling lights.  If you live in a snowy region you may even have the sparkle of snow.


These tags were so much fun to make and most of them are not the same but they are similar in design.  There was lots of distressing and glitter involved.  I also did some embossing.


The background of the "Joy" tag was distressed using the Distressing Essentials kit then stamped with the En Francais background stamp on Very Vanilla cardstock.  To create the round tag shape, I had folded a piece of Very Vanilla cardstock in half then punched it out using the 2 1/2" Circle punch but made certain I left space at the fold so it would create a folded circle tag.  Then I stamped an ornament stamp from the Delightful Decorations stamp set in VersaMark then in Riding Hood Red Classic Ink followed by sprinkling Heat & Stick Powder which I heated with the Heat Gun.  After the Heat & Stick Powder was heated up, I sprinkled glitter over the ornament then reheated the Heat & Stick Powder with the Heat Gun so the glitter would stick to the design.  The snowflakes were made using the Northern Frost Big Shot Decorative Strip.  To make the snowflakes sparkle I dabbed Platinum shimmer paint on them.


For this tag, I did not distress the background but I did stamp the background using the En Francais background stamp with basic black classic ink.  The snowflake was made using the Northern Frost Big Shot Decorative Strip with a glimmer brad added in the middle.  I used black craft ink to stamp the ornament image from the Delightful Decorations stamp set then embossed it with black embossing powder which was then punched out with the ornament punch.  Both the snowflake and ornament are attached to the tag using dimensionals.  The ribbon bow is attached with a pop dot.


 Overall, I made a set of 10 tags that fit nicely inside the Perfect Packaging - Terrific Tin.  Here are all ten tags that I made using the Delightful Decorations stamp set or the Tags til Christmas Stamp set.


SunnyGirlScraps Tips of the Day:

  • Craft Ink works great for embossing along with using Clear Embossing Powder.
  • If you don't have Craft Ink, you can stamp your image with versamark ink then immediately ink your stamp with your color of choice using the classic ink.
  • After you have inked your stamp with versamark and classic ink, quickly stamp your image onto your paper and sprinkle the image with your embossing powder then heat it with the Heat Gun.


Like this project?  Please share your thoughts or questions by leaving me a comment below.  I love hearing from all my readers and also encourage you to share my blog with your friends - word of mouth is one of the greatest forms of flattery.

To purchase supplies for this project, click 
HERE or email me at sunnygirlscraps@gmail.com!  


Do you enjoy making similar handcrafted items?  Not a Stampin' Up! Demonstrator?  Now is a great time to think about becoming a Stampin' Up! Demonstrator.  Starting on November 15th until November 30th, purchase the Starter Kit OR Digital+ Starter Kit for 50% off during the Simply Amazing Stampin' Up! Starter Kit Promotion which includes FREE SHIPPING.  


To sign up as a demonstrator and join my team, click HERE!


My recruit password is:  SUNNYGIRL

Sunny Stampin' & Scrappin'!

Pam Staples


Project Recipe:


Ink:  Basic Black Craft (102192), Basic Black Classic (101179), Riding Hood Red Classic (111836), VersaMark (102283)


Cardstock:  Riding Hood Red (111348), Very Vanilla (101650)


Accessories:  Shimmer Paint - Platinum (116807), Shimmer Paint - Champagne Mist (116806), Glimmer Brads - Basics (121003), 1/8" Taffeta Ribbon - Very Vanilla (119960), Black Embossing Powder (109133), Dazzling Diamonds Stampin' Glitter (102023)


Tools:  Big Shot (113439), Heat Tool (100005), 2 1/2" Circle Punch (120906), Ornament Punch (119847), Square Punch (119865), 1 3/4" Scallop Circle Punch (119854), Distressing Essentials Kit (118762)


Gift Wrapped Perfect Packaging


Perfect Packaging - The Terrific Tin


I just love the classic style of this Terrific Tin!  Basic Black and Very Vanilla come together for perfection in this small tin with a matching tag attached.  I used the Love Letter Designer Series Paper to create a classic package perfect for gift wrapping any small gift such as an engagement ring, ear rings or any of the Simply Adorned Charms.  


When I decorate packaging, I always measure dimensions then subtract approximately 1/8th to 1/4th from the dimensions of the cardstock and designer series paper that I use to create the finished packaging.  Since this is a round tin, I used the Circle Scissor Plus to cut out the different sized circles.


This tin also worked great for some Christmas Tags that I made.  To see the tags, come back tomorrow.

Top View

Side View along with matching tag
 SunnyGirlScraps Tips of the day:
  • Don't be afraid to dress up brown lunch bags or boxes to create unique gift packaging.
  • Think about recycling and reusing gift bags you've receive but add your own touch by using Stampin' Up! Designer Series Paper, card stock and stamps.
  • If you are a guy - don't worry about the overall outcome as you often it is the "attempt" that really matters!  One of my husbands greatest valentine gifts were a mini poem book he made along with a handmade cupcake box that kept falling apart.  We also have found family memories of the time my brother used ELECTRICAL tape to wrap Christmas Gifts because he didn't own any other tape.
  • Circle Scissor Plus - This can sometimes be a frustrating tool.  I've found the secret to cutting paper and card stock is to attach the material you are cutting to the glass mat using adhesive placed on the four corners of the paper.  It is also important to be patient.  I also keep the scraps especially as sometimes using the Circle Scissor Plus "wastes" paper.  Again, keep in mind the idea of "recycling" your cut pieces of paper.
Like this project?  Please share your thoughts or questions by leaving me a comment below.  I love hearing from all my readers and also encourage you to share my blog with your friends - word of mouth is one of the greatest forms of flattery.

To purchase supplies for this project, click 
HERE or email me at sunnygirlscraps@gmail.com!  


Do you enjoy making similar handcrafted items?  Not a Stampin' Up! Demonstrator?  Now is a great time to think about becoming a Stampin' Up! Demonstrator.  Starting on November 15th until November 30th, purchase the Starter Kit OR Digital+ Starter Kit for 50% off during the Simply Amazing Stampin' Up! Starter Kit Promotion which includes FREE SHIPPING.  


To sign up as a demonstrator and join my team, click HERE!


My recruit password is:  SUNNYGIRL


Sunny Stampin' & Scrappin'!

Pam Staples
SunnyGirlScraps
Stampin' Up! Independent Demonstrator


Project Recipe:

Ink: Basic Black (101179)

Designer Series Paper:  Love Letters (117162)

Cardstock:  Very Vanilla (101650), Basic Black (121045)

Accessories:  Basic Black Satin Ribbon (117285), Decorative Label Punch (120907), Distressing Essentials (118762), Circle Scissors Plus (112530), Glass Mat (112531)

Stamp Set:  En Francais (109521)

Stampin' Up! Amazing Starter Kit Promotion


Simply Amazing Stampin' Up! Starter Kit Promotion!

Starting today, this simply amazing Stampin' Up! Starter Kit promotion is NOW available...

Don't miss this great opportunity!  Sign up NOW as a demonstrator and receive this great package containing the following:

  • Over $310.00 worth of Stampin' Up! product for only $87.50 with FREE Shipping (applicable state tax applies).
  • Kit includes all the business supplies you need to get you started.
  • 30% discount on your first Demonstrator Order.
  • 20% Demonstrator Discount on all future Demonstrator Orders.
  • Opportunity to earn free stamp sets and product as well as free business supplies through the Great Rewards program.
  • Opportunity to earn additional income through volume rebates.
AND so much more!


This opportunity ends on November 30, 2010! Now is definitely the time to become a Stampin' Up! Demonstrator with all the wonderful benefits of being an Independent Demonstrator with a great company.

To sign up online, click HERE! Then enter my password: Sunnygirl.


Sunny Stampin' & Scrappin'!

Pam Staples

Gift Box with Panache!


Stylish Gift Box!

The past few days have been absolutely crazy in the Staples household between arriving home Sunday from a weekend scrapbook retreat at the beach, then my husband rushing off to work the moment I walked into the door, Kindermusik classes and Physical Therapy for the little one.  This week has just been flying by and I feel like I haven't accomplished nearly what I was hoping to accomplish which results in some "late" nights for me after everyone else has gone to bed.

This is a project I made this past weekend while scrapbooking at the beach!  I absolutely love these beach retreats.  A friend organizes the scrapbook & crafting beach retreats by renting a beach home.  There are usually 10 to 12 friends that go.  These retreats are turning into a twice a year tradition - next retreat we may even find a massage therapist to come in and provide some massages!

As for this stylish box, I made the box using two 12x12 pieces of cardstock.  I need to add that I was making this for my Secret Pal.  Of course, she happened to be sitting across from me asking all sorts of questions about the box and what I was planning to put in the box.  Admittedly, I was avoiding most of the questions by pretending I didn't know what she was "asking" or by looking dazedly confused as a result of my drug induced haze caused by the sinus infection I was getting over.


Isn't this box beautiful with a classic style?  The background paper isn't a Christmas themed paper but I love how using a Christmas stamp set makes the box into a great gift box.  The "Top Note" design is raised using dimensionals so the Basic Black Satin Ribbon slips underneath.  As mentioned previously, I used 12x12 Cardstock with the cover being Very Vanilla and the base of the box (not shown) being Basic Black.  The depth of the sides is 3 inches.

To make the base of the box, I scored the base at THREE inches on each edge then cutting in 3 inches along ONE of the intersecting corners doing this 4 times.  Using Sticky Strip, I folded along the score line to create the box shape and used the sticky strip on the flap edges to assemble the box. 

The top of the box was made using the same directions as the base of the box except I scored at 2 15/16th to make the cover easier to remove otherwise I find the cover sticks and is difficult to remove which can damage the base of the box.  With a box this beautiful, I would want to try to preserve the integrity of the box so it can be reused.

Finally, I decorated the box using the Love Letter Designer Series Paper and Riding Hood Red Cardstock on the top and each side of the cover of the box.  Adding extra decoration also creates a stronger box.  Using the Big Shot and Top Note die, I cut out the top design element using Basic Black and Very Vanilla Cardstock then I used the new Stampin' Up! Distressing kit with the charcoal dye ink and "blank" rubber stamp to add a distressed appearance to the Very Vanilla Cardstock.  I am in LOVE with the look that this distressing ink creates when used with the "blank" rubber stamp.  With some trial and error I was able to figure out what works best for me when trying to apply the distressing ink.  I also used the French Script Background Stamp to add to the "distressed look" making certain the image wasn't clear.  The last step was to stamp the tree, apply the ribbon and one button to the back of the Top Note which was then attached to the box.

SunnyGirl Tips:

  • Find time to enjoy the things that you love!
  • When using the distressing kit, lightly brush the "blank stamp" in and onto your cardstock while not worrying about the final outcome because you WANT a distressed look - not a perfect, uniform look!
  • Boxes can be a lot of fun to make.  Find a basic pattern such as a square box design and get creative with the size - Square is an easy box style to work with!

Like this project?  Please share your thoughts or questions by leaving me a comment below.

To purchase supplies for this project, click
HERE or email me at sunnygirlscraps@gmail.com!  

Do you enjoy making similar handcrafted items?  Not a Stampin' Up! Demonstrator?  Now is a great time to think about becoming a Stampin' Up! Demonstrator.  Starting on November 15th until November 30th, purchase the Starter Kit OR Digital+ Starter Kit for 50% off during the Simply Amazing Stampin' Up! Starter Kit Promotion which includes FREE SHIPPING.  To sign up as a demonstrator and join my team, click HERE! My recruit password is:  SUNNYGIRL

Sunny Stampin' & Scrappin'!

Pam Staples
SunnyGirlScraps
Stampin' Up! Independent Demonstrator


Project Recipe:

Cardstock:  Basic Black 12x12 (119922), Very Vanilla 12x12 (119951), Riding Hood Red (111348)

Designer Series Paper:  Love Letter (117162)

Accessories:  Big Shot (113439), Top Note Die (113463), Basic Black 5/8" Satin Ribbon (117285), Basic Black 1 1/4 Striped Grosgrain Ribbon (115615), Very Vanilla 1/8" Taffeta Ribbon (119960), Designer Buttons - Brights Old Olive (119747), Distressing Essentials Kit (118762)

Ink:  Basic Black (101179), Old Olive (102277)

Stamp Sets:  Snow Swirled (111690), En Francais (109521)

Snow Swirled
En Francais


Simply Amazing Stampin' Up! Starter Kit Promotion


Simply Amazing Stampin' Up! Starter Kit Promotion!

Wow! This is such a wonderful opportunity!

What else do you call a deal were you receive over $310.00 in Stampin' Up! product for the great price of $87.50 with FREE shipping. You call it a Stupendous Stampin' Up! Starter Kit Promotion where you can choose between the Standard Starter Kit or the Digital+ Starter Kit and purchase the kit at 50% off the regular price of $175.00 for over $310 worth of paper or digital crafting as well as your business supplies. If you've ever considered becoming an Independent Stampin' Up! Demonstrator then now is the time to join.  This is an unbelievable opportunity for anyone that has ever given thought to becoming a Stampin' Up! Demonstrator.

This opportunity starts on November 15, 2010 and ends on November 30, 2010! Now is definitely the time to become a Stampin' Up! Demonstrator with all the wonderful benefits of being an Independent Demonstrator with a great company.

To sign up online, click HERE! Then enter my password: Sunnygirl.


Blog Candy Winner


Congratulations

I'm excited to announce that Jeanne Nielsen is the winner of my BLOG CANDY from the Royal Blog Tour!  She has won the Party This Way clear mounted stamp set along with the Celebrations Designer Series Paper!  Again, Congratulations Jeanne Nielsen.

Sunny Stampin' and Scrappin'!

Pam Staples


Wow! I love being a Princess.


I just had to share that I really enjoyed participating on the Royal Blog Tour this past weekend.  When time allowed, I was able to visit many of the other blogs on the tour but I'm still going back to look closer by going directly to the website at www.royalblogtour.com where I can access links to all the other blogs that were on the tour.

If you haven't had a chance to check out the whole tour, there is still time.

In the meantime, I'm preparing to participate in a local elementary school craft fair (if I'm accepted) as well as a community craft fair that myself and a few neighbors are putting together. 

This past weekend I also enjoyed a weekend getaway scrapbooking and crafting on Topsail Island!  It was very relaxing and so much fun - A shout out to my Cary Table Scrapps craft group!  I love you ladies along with Jen as our fearless leader planning these getaways.

Sunny Stampin' & Scrappin!

Pam Staples

Royal Blog Tour - Party This Way!


Party This Way! 

Good day and welcome my royal patrons!

I am Princess Pam and tis' a "Sunny" time for a Royal Tour!  Verily, I welcome thee to the SunnyGirlScraps Royal Palace with a merry Huzzah.  I pray thee has enjoyed visiting the other Royal Castles!  Tis' many wondrous ideas and projects being shared by my fellow Princesses. Now, twould please me greatly to have thee peruse my Castle.  

Mayhap thee will find inspiration here!  Tis' time to "Party This Way" as I highlight this stamp set.  In faith, 'twas easy to use this fun stamp set as 'tis especially great for creating party themed cards and favors.  Most recently, I used the "Party This Way" stamp set to create invitations for my son's first birthday along with party favors, decorating his birthday hat and his birthday card along with creating a couple of scrapbook pages!

Verily thee may also desire the opportunity to win some blog candy!   To be entered into a drawing for blog candy, thee MUST send an email to sunnygirlscraps@gmail.com and include thy NAME along with thine EMAIL so I may contact thee if thou dost win.  I also pray that thee would leave a comment on my post.

Prithee will you come along and "Party This Way"...

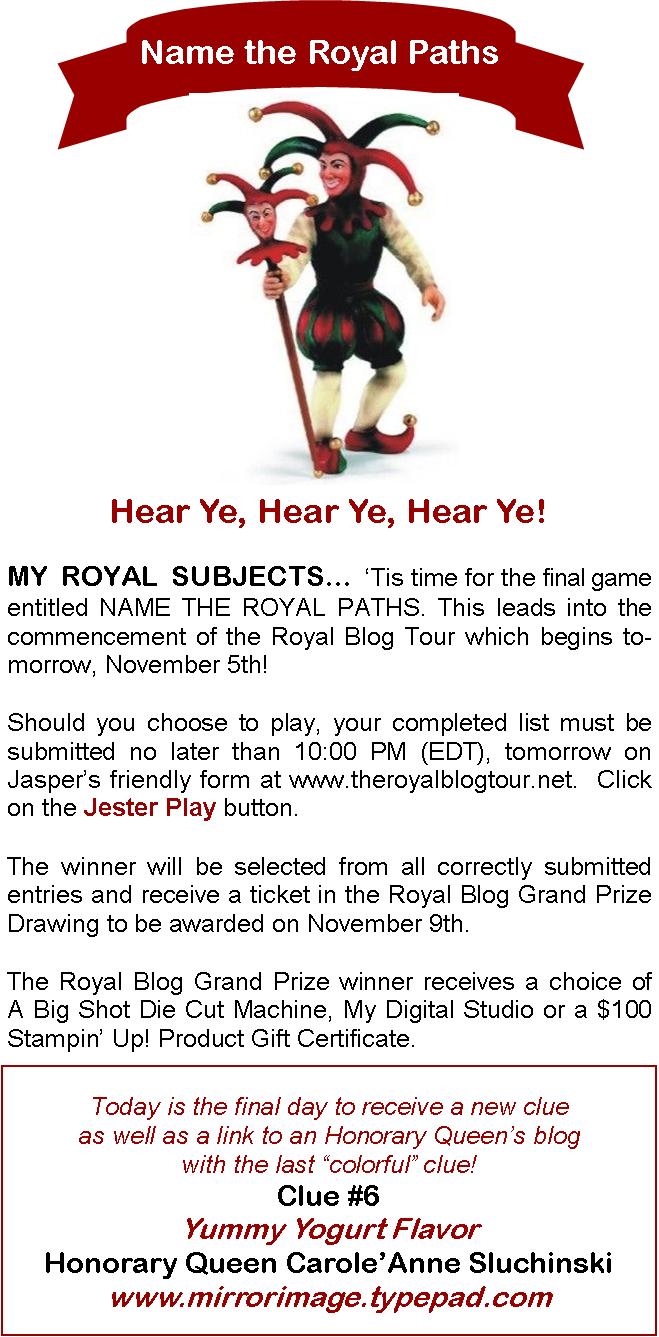
Hear Ye! Hear Ye!  Thou hast been issued an invitation to "Party This Way."  This was a fun invitation to make for my son's 1st birthday and 'twas wonderful to have my non-crafty husband help with making 50 of these invites!  I came up with the design and my husband actually did most of the cutting and punching while I stamped and assembled the pieces.  Pray tell, mine husband did a wonderful job did he not?


Now, every little lad must have a cute birthday hat for his celebration!  I used the Celebrations Party Hats (Item # 118716) to make party hats for all the royal lads and ladies in attendance.  Of course, the Royal Prince required a specially decorated hat showing that he was the birthday lad turning one!  Along with the hats, each little royal lad and lady in attendance received a party favor.  For the party favor, I used the Candy Wrapper die for the Big Shot then decorated the Candy Wrapper with the Celebrations Designer Series Paper and the "Party This Way" balloons.  Inside the Candy Wrapper were the small party bubbles.


The birthday card for my little Prince was kept simple.  This card design was cased from a swap I participated in with my upline.  I loved the simplicity of the design and my husband loves monkeys.  Inside the card, I layered a piece of whisper white cardstock and I stamped one candle in honor of little Prince turning one.


Alas, thou ist almost to the end of the Castle.  My final two projects showcase a scrapbook pages I've created for my little Prince.  As you can see, my little Prince actually wore his party hat!  I absolutely love this scrapbook page with a classic layout.  The photos are the main feature sandwiched between the title with the accents being stamped images from the "Party This Way" stamp set.  The second scrapbook page focuses on the guest autographs.  I started the "autograph page" tradition with my nieces and plan to continue it with my little Prince.


Alas, Good Friends, 'tis with sorrow that we've come to the end of my Castle for this Royal Tour!  'Twas all my pleasure as thee host and I pray that thee enjoy the other Royal Castles of the Royal Blog Tour.  I thank thee for thine visit and wish you a fare thee well on your travels.

If thine has any questions, don't hesitate to email me at sunnygirlscraps@gmail.com.

Sunny Stampin' & Scrappin'!

Royal Princess Pamela Staples

BLOG CANDY

Perchance though wouldst desire the opportunity to win some blog candy!   To be entered into a drawing for blog candy, thee MUST provide your name and email address which may be sent via email to sunnygirlscraps@gmail.com or include the information in your comment.  The second requirement to winning Blog Candy is having thee leave a comment on my post.

If thou hast met these requirements, in faith thee will be entered into a drawing to win the Party This Way Clear Mount Stamp Set AND Celebrations DSP:
Celebrations Designer Series Paper

Party This Way Clear Mount Stamp Set

Project Information:
Party This Way Stamp Set

Highlighted Stamp Set:  Party This Way (w:  118744; c: 120609)

Ink:  Real Red (103133), Pacific Point (111837), Daffodil Delight (119667), Pear Pizzazz (119784),

Cardstock:  Bashful Blue (105120), Real Red (102482), Pacific Point (111350), Daffodil Delight (119667), Pear Pizzazz (119795), Vellum Paper (101839)

12x12 Cardstock:  Bashful Blue (119973)

Designer Series Paper:  Celebrations (117164)

Accessories:   Celebrations Party Hats (118716), Quick Accents - Celebrations (118708), Big Shot (113439), Candy Wrapper Bigz L Die (120890), Square Lattice Embossing Folder (119976), Alphabet Simple Letters (115960), Designer Buttons - Subtles (119745), Oval Punch (119863), Scallop Oval Punch (119856), Cog Punch (118873), 1 3/8 Circle Punch (119860), 1 1/4 Circle Punch (119861), 1 Circle Punch (119868), 1/2 Circle Punch (119869), Hemp Twine (100982), Round Tab Punch (119864), Brads - Brights (119740)

Other Stamp Sets:  Inviting (w: 119153; c: 120630), Fox & Friends (w: 117020; c: 118565), Tiny Tags (w: 118091; c: 118592), Schoolbook Serif Numbers (111680)


Royal Blog Tour Contest - Clue #6


Posted by Picasa

Royal Blog Tour Contest - Clue #5


Posted by Picasa

Royal Blog Tour Contest - Clue #4


Posted by Picasa

Craft for a Cause Contest 2010 - Vote for Operation Write Home


I just had to share this with everyone!

Operation Write Home is one of the 3 top finalists in the Craft for A Cause Contest.  Joann Crafts is giving away prize money to the cause with the highest fan votes.

Operation Write Home is a small, non-profit that could really use the prize money to support their operating costs.  A vote for OWH also supports our Military Men & Women!

Go Vote NOW!!!

Click HERE to vote!


Snowflakes and Silk


Serene Snowflake Silk Scarf

Here is my latest craft project.  I just discovered stamping on silk scarves and I just love how easy it is to stamp on silk scarves.  For this scarf, I opted to go with a winter theme of snowflakes using the Serene Snowflake stamp set.  I've actually used 3 shades of blue craft ink.

This is a fun project.  Of all the projects that I do, this is one of my husbands favorites. 


SunnyGirlScraps Tips:
  • Rules of Composition - Sometimes rules are just meant to be broken but a good guideline is to first know the rules before you break the rules.
  • When you are out taking "snap-shots" think about the Rules of Composition and how you can take better photographs to use on your scrapbook pages.
  • When creating scrapbook pages consider the same Rules of Composition that you applied to your photographs.


Like this project?  Please share your thoughts or questions by leaving me a comment below.

To purchase supplies for this project, click HERE or email me at sunnygirlscraps@gmail.com


Sunny Stampin' & Scrappin'!

Pam Staples


Project Recipe:

Stamp Set: Serene Snowflakes (115438)


Ink:  Craft Stampin' Spots - Regal (119717), Marina Mist Craft Stampin' Ink Refill (121605), Blank Craft Stampin' Pad (122265)

Royal Blog Tour Contest - Clue #3


Posted by Picasa

Royal Blog Tour Contest - Clue # 2


Posted by Picasa