A Wicked Spooky Halloween


Spooky Elegance

I must admit that this was a difficult card to make especially since we don't celebrate Halloween in our family.  We prefer to focus on All Saints Day.   Even though we do not celebrate Halloween, there are many that do including my nieces.  I do make it a personal policy to not do anything overly scary. 

At convention this year, I won a prize patrol and you would never guess what I won!  Yep, I won a Halloween Stamp Set and designer series paper.  Just my luck - but it was free and I will use it the best that I can!

This is the card that I made for my oldest niece.  She is enjoys feminine touches.  So I included some lace and jewels.  The black flourish jewels are so fun and add an elegant touch.  Sponging is another technique I also enjoy.


SunnyGirlScraps Tips:

  • When using the Designer Jewels Black Flourish, follow the directions!  It is key to place the transfer sheet on top of the jewels and rub hard then peel back the original backing sheet.  Peel the backing sheet off slowly.
  • Once you have used the sponge daubers with a specific color, place a label on the dauber with the ink color so you always know what color is on the dauber.
  • Rules of Composition - Texture!  Texture is a wonderful way to add interest and dimension to your photographs and projects.  When people see texture in an image they can start imagining what it feels like to touch what is in the photo.  Texture is a good idea when your taking pictures of rocks, walls, surfaces, someone’s hands, or leaves. To reveal texture in a photograph, make sure the light is coming almost exactly from the side of the surface so it creates shadows in key places.

Like this project?  I love to hear from my blog visitors.  Please share your thoughts or questions by leaving me a comment below.

To purchase supplies for this project, click HERE or email me at sunnygirlscraps@gmail.com! 


Sunny Stampin' & Scrappin'!

Pam Staples


Card Recipe:

Ink:  Pumpkin Pie (105216), Basic Gray (109120), Daffodil Delight (119667), Basic Black (101179)

Cardstock:  Peach Pizzazz(119794), Basic Black (121045), Basic Gray (121044)

Designer Series Paper:  Wicked Fun Specialty (117400)

Accessories:  Designer Jewels Black Flourish (120987), Trim Lace Raven (120988), Pumpkin Pie Satin Ribbon (119749), Circle Scissor Plus (112530), Glass Mat (112531), 2 3/8" Scallop Circle XL (118874), Big Shot (113439), Embossing Folder - Square Lattice (119976)

Stamp Set:  Wicked Cool (w:118738; c: 120600)
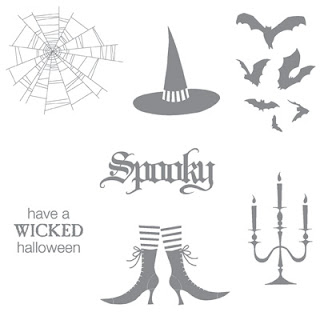
Wicked Cool

Get Well Simplicity


Strikingly Elegant in a Simple Get Well!

Earlier this week I found out that one of my clients had been hospitalized.  With that news, I just knew I had to make her an elegant card.  This lovely lady is so wonderful and such a pleasure to be around.  We were actually planning to do a Christmas themed workshop in late September but she had to cancel because she had been sick so we decided we would try to reschedule.  Well, I was trying and trying to reach her but kept getting her voice mail.  Then I received an email from a mutual friend informing me she was in the hospital but hoping to go home in a day or two.  With that news, I set out to create a card I knew she would enjoy receiving.

This card is really simple yet looks so very elegant.  I've totally fallen head over heals in love with this card.  The base of the card is Crumb Cake then I took a piece of Real Red cardstock which I embossed using my Big Shot and Elegant Bouquet embossing folder.  For the sentiment, I used the Wellness Wishes stamp set which I colored with the Stampin' Markers for the two tone effect.  The ribbon I used is the 1 1/4 striped Real Red Grosgrain ribbon.  By the way, I LOVE the 1 1/4 striped grosgrain ribbons.  The decorative boarder around the sentiment was created by using the new Decorative Label punch - Don't you just love the effect (I think I'll be doing it more often)!  I then used the small jewelry tag punch stamped with a small image from the Tiny Tags stamp set which I tied around the ribbon using the Hemp Twine. The final touch to this card was adding three small pearls to the embossing creating a line that leads the eye up towards the sentiment.

Over the past few days I've included several tips on composition. Can you figure out what tips I've used as a guideline for creating this card?  I used a couple of those Rules of Composition.  I would like to mention that on occasion, rules are meant to be broken and no rule is ever set in stone.  The Rules of Composition are available to help guide you and get you started with your projects.


SunnyGirlScraps Tip:
  • The 1 1/4" grosgrain ribbon looks great on cards and I love highlighting the ribbon by tying a piece of hemp twine or linen thread in a bow gathering the ribbon together.
  • To add dimension with the jewelry tag, punch 3 small tags with coordinating colors and layer them together.
  • Rule of Composition - Framing!  From the view of a photographer, the world is full of objects which make perfect natural frames, such as trees, archways and holes. By placing these around the edge of the composition you help to isolate the main subject from the outside world. The result is a more focused image which draws your eye naturally to the main point of interest.  As an example in my card, I've used the Decorative Label punch to create an interesting frame around the sentiment.

Like this project?  Please share your thoughts or questions by leaving me a comment below.

To purchase supplies for this project, click HERE or email me at sunnygirlscraps@gmail.com! 


Sunny Stampin' & Scrappin'!

Pam Staples


Card Recipe:


Ink:  Real Red (103133)

Stampin' Marker:  Real Red (100052), Early Espresso (119680)

Cardstock:  Real Red (102482), Crumb Cake (120953), Whisper White (100730), Early Espresso (119686)

Accessories:  1 1/4" Real Red Grosgrain Ribbon (119768), Jewels - Basic Pearls (119247), Hemp Twine (100982), Decorative Label Punch (120907), Jewelry Tag Punch (117190), Big Shot (113439), Embossing Folder - Elegant Bouquet (115964)

Stamp Sets:  Wellness Wishes (w: 115356), Tiny Tags (w: 118091, c: 118592)

Wellness Wishes


Tiny 

Snowflake Christmas Tag


Fun Snowflake Treat Tag!


This was a fun project.  The "tag" is actually a folded card with a cellophane bag inside.  Think of how a tea bag sits inside its small packaging and that is what this card is based off.  We made a similar project as one of the make-n-takes from the 2010 Stampin' Up! Convention.  I loved the concept and thought it would be really cute as a Christmas Tag that included an extra little treat.

To create the "Tea Bag" Tag, I cut a strip of 8 1/2 x 11 cardstock down to 3 1/2 x 10 then scored a line at 4 1/4 and another line at 8 1/2.  With the shortest piece cut on both edges to create a triangular piece to fit into a slot made by using the word window punch.  The cellophane bag that I used on the inside is the Small Flat Cello bags from Stampin' Up! that I cut the size of the Cello bag down to 4".  The Cello Bag is attached inside the card with sticky strip.

I think that a small Dove chocolate would be a perfect treat to put inside the Cello bag as part of the tag.

SunnyGirlScraps Tips:
  • To make the "fish tail" on your ribbon, fold the ribbon in half then cut inwards from the two folded halves towards the knot.
  • When applying the Jewel Basic's use the tip of your paper snips to lift the pearl or rhinestone along with the adhesive from the backing (Paper piercer also works great).
  • Rules of Composition - Simplicity!  Simplicity is the method of keeping the information in your project relatively simple.  With photography, keep in mind that if your main subject is close, then your background should be very simple to avoid distractions.  Try to keep everything that is not important much less interesting than what’s important in the project or photo.  A key feature of "simplicity" is to avoid lines or objects that lead the eye away from the main subject of your photo or project.
Like this project?  Please share your thoughts or questions by leaving me a comment below.

To purchase supplies for this project, click HERE or email me at sunnygirlscraps@gmail.com! 


Sunny Stampin' & Scrappin'!

Pam Staples


Project Recipe:

Ink:  Classic Real Red (103133)

Cardstock:  Real Red (102482)

Accessories:  Oval Punch (119855), Scallop Oval Punch (119856), Snowflake Punch (119852), 1 1/4" Striped Real Red Grosgrain Ribbon (119768), Word Window Punch (119857), Small Cello Bag (103104), Hemp Twine (100982), Jewels - Basic Rhinestone (119246)

Stamp Sets:  Serene Snowflakes (115438); A Cute Christmas(w: 120825; c: 121133)
Serene Snowflakes

A Cute Christmas

A Revised Twist on Tags til Christmas


Another Tags til Christmas Color Twist!

Here is a second fun card using the Candy Cane Christmas Designer Series Paper which has an unusual color scheme for Christmas.  With this card, I used a different pattern and glitter brads to show how just a few small adjustments can change a look of a card.  Another change was the ink color used for the sentiment at the bottom of the card.

This card is based on the same layout that I posted the past two days but with a few changes.  The addition of the glitter brads took this card up a level but the change to glitter brads in the same color as the ribbon also added a new dimension.  Also, notice how I place elements so your eye is drawn to each item in a circular fashion.


SunnyGirlScraps Tips:

  • When creating a card or scrapbook page, think about different design concepts such as "Leading Lines."  Leading Lines are used to lure the eye deeper into the subject or project.  Straight, curved, parallel, or diagonal lines are all good at promoting interest.  In photography, good examples could be roads, rivers, streams, bridges, branches, or fences but there are endless things that could be used. In this project, my leading lines are found in the Designer Series Paper.
  • Grouping elements.  Different elements that are the same color grouped together help draw the eye towards that grouping.
  • Stampin' Up! punches are a great option to help you create interesting elements.  For example, I used two different punches on this card to help create interest.

Like this card?  Please share your thoughts or questions by leaving me a comment below.

To purchase supplies for this project, click HERE or email me at sunnygirlscraps@gmail.com! 


Sunny Stampin' & Scrappin'!


Pam Staples


 Card Recipe:

Ink:  Baja Breeze (111833)

Cardstock:  Baja Breeze (111352), Whisper White (100730), Blushing Bride (119796)

Designer Series Paper: Candy Cane Christmas (120809)

Accessories:  Scallop Trim Border Punch (118402), Decorative Label XL Punch (120907), Real Red 1/8" Taffeta Ribbon (119251), Glimmer Brads - Brights (121006)

Stamp Sets:  Tags Til Christmas (w: 120847; c:121169); Curly Cute (w: 117014, c: 120510)

Tags til Christmas
Curly Cute

A Color Twist on Christmas Cards


Tags til Christmas Color Twist!


Here is a fun card using the Candy Cane Christmas Designer Series Paper which has an unusual color scheme for Christmas.  This color scheme can be a fun challenge.  I'm slowly falling in love with this color combination but I can't say it will ever be an absolute favorite!  Personally, my favorite Christmas color scheme is Navy Blue.

This card is based on the same layout that I posted yesterday but just added a few embellishments.  The addition of the glitter brads took this card up a level.  Also, notice how I place elements so your eye is drawn to each item in a circular fashion.


SunnyGirlScraps Tips:

  • When creating a card or scrapbook page, think about different design concepts such as the Rule of Thirds often used in Photography and by artists.  The Rule of Third breaks an image into 9 sections (think of a tic tac toe grid) then elements are placed so they follow along those lines.
  • Grouping elements.  I also like to group elements to help draw the eye to look at all aspects of a card.  For example, I grouped the three brads with the bow.
  • The Color Coach is an awesome tool offered by Stampin' Up! that can help you find a different color combination you may not have considered.

Like this card?  Please share your thoughts or questions by leaving me a comment below.

To purchase supplies for this project, click HERE or email me at sunnygirlscraps@gmail.com! 


Sunny Stampin' & Scrappin'!


Pam Staples


 Card Recipe:

Ink:  Real Red (103133)

Cardstock:  Baja Breeze (111352), Whisper White (100730), Blushing Bride (119796)

Designer Series Paper: Candy Cane Christmas (120809)

Accessories:  Scallop Trim Border (118402), Real Red 1/8" Taffeta Ribbon (119251), Glimmer Brads - Brights (121006), Heat Tool (100005), Heat & Stick Powder (100625), Dazzling Diamonds Stampin' Glitter (102023), Decorative Label XL Punch (120907)

Stamp Sets:  Tags Til Christmas (w: 120847; c:121169); Curly Cute (w: 117014, c: 120510)

Tags til Christmas
Curly Cute

A Cute Christmas


Whimsical and Fun!


This weekend I took some time to create some fun and whimsical cards using the stamp set "A Cute Christmas."  There is something sweet and innocent about this set that I just love.  It has simple, yet fun designs.

I also used the Candy Cane Christmas Designer Series Paper found the in the current Holiday Mini Catalog.  This paper has some non-traditional colors thrown in with the traditional .  You'll find the traditional Red and Green with a non-traditional "blushing bride" pink and "Baja Breeze" blue.  The color combination in this paper can be a challenge but also gives you the opportunity to explore new avenues in color.

This card is a sweet and simple design that is quick to make.


Like this card?  Please share your thoughts or questions by leaving me a comment below.

To purchase supplies for this project, click HERE or email me at sunnygirlscraps@gmail.com! 


Sunny Stampin' & Scrappin'!


Pam Staples


Card Recipe:

Ink:  Baja Breeze (105209)

Stampin' Write Markers:  Baja Breeze (120965), Garden Green (100080), Blushing Bride (119801)

Cardstock:  Baja Breeze (111352), Whisper White (100730), Blushing Bride (119796)

Designer Series Paper: Candy Cane Christmas (120809)

Accessories:  Pinking Hearts Border Punch (117649), Scallop Rectange Clearlit (118872), Big Shot (113439), Real Red Grosgrain Ribbon (109034)

Stamp Sets:  A Cute Christmas(w: 120825; c: 121133), Four The Holidays (116921)

A Cute Christmas Stamp Set

Four The Holidays Stamp Set

Just Believe Candle Reflections


Stamping on Candles

Just Believe in Watercolor!


I've had this Partylite candle sitting in my bathroom and after my first foray into stamping on a candle I started looking for more candles to stamp on!  This candle which is a similar shade to Certainly Celery was just begging to be stamped on.  It is a fairly tall pillar candle and it needed a stamped pattern that was of a taller nature.

I love the "Just Believe" stamp set that 2010 Convention attendees received for our Make-n-Takes.  For the effect on this candle, I colored the image with the Stampin' Write Markers lightly spritzing the stamp with a water mister after I was done coloring the stamp.  I then stamped the image onto a sheet of tissue paper.

The resulting affect on the candle is beautiful with this candle now sitting front and center on my bathroom vanity.


SunnyGirl Tips:

  • I wrap parchment paper around the candle then heat with my heat gun.  The one time I used wax paper I didn't like the way it melted with the candle and I had issues with air bubbles.
  • When misting a stamp that has been colored with the Stampin' Write Markers, use a very fine mister. 
  • Attache stamped image to the candle using a small amount of adhesive such as snail adhesive. 

    Like this card?  Please share your thoughts or questions by leaving me a comment below.

    To purchase supplies for this project, click HERE or email me at sunnygirlscraps@gmail.com! 

    Sunny Stampin' & Scrappin'!

    Pam Staples


     Project Recipe:

     Stampin' Write Markers:  Wild Wasabi (120975), Always Artichoke (105113), Tangerine Tango (120974), Peach Pizzaz (119801)

    Stamp Set:  Just Believe  (w: 116948; c: 120453)

    Whimsical Christmas Card Box


    A Cute Christmas Card Box


    I've fallen in love with this fun, whimsical Christmas stamp set!  It has a mix of outline stamps which allow for a variety of Christmas related creativity.  Yesterday, I posted my first video tutorial and this is the final creation resulting from the video.


    It was a fun box and I look forward to filling it with 10 cards and envelops following in the same theme using the stamp set, A Cute Christmas.  Keep an eye open for a sampling of the cards that will be going inside this box!

    A Cute Christmas Card Box
    Project Recipe

    Ink:  Cherry Cobbler (119669)
     
    Cardstock:  Cherry Cobbler (119685), Always Artichoke (105119)

    Accessories:  Real Red 1 1/4" Striped Grosgrain Ribbon (119768), Large Tag Punch (119876), Extra Large Tag Punch (119866)

    Designer Series Paper:  Candy Cane Christmas DSP (120809)

    Stamp Set:  A Cute Christmas (w: 120825; c: 121133)

    A Cute Christmas


    Sunny Stampin' & Scrappin'!

    Pam Staples

    Card Box Video Tutorial


    Standard Sized 5 1/2 x 4 1/4 Card Box Tutorial!

    It's here!  It's here!  I'm so excited to be sharing my very FIRST tutorial!  A few posts back, I had requests for a tutorial on how I make the boxes for my standard cards and here it is.  This is a new foray into the unknown for me.

    I actually received a Flip Video Camera in late April as my early Mother's Day gift from my husband and son.  I've used it for a ton of videos of my son while we were visiting Minnesota and my husband was back home in North Carolina but I had not really tried my hand at editing.  For this first video, I just used the editing abilities provided with the Flip program.  I do ask for some leeway :)  There is still much I need to learn about editing videos.


    Sunny Stampin' & Scrappin!
    Pam Staples

    Pink Fix Box


     PINK FIX times 2!


    I'm on a roll!  Yep, I'm really getting my pink fix and I'm loving it.  This recent project is a box that I made to fit the two square candles that I recently made as a gift.  Since these candles were a gift I needed to have packaging so I measured the candles to come up with the dimensions for the box.  Both the base and the cover of the box were each made from one sheet of 8 1/2 x 11 cardstock cut down to 8 1/2 x 10 1/2.  Based on the "depth" of the candles, I scored the paper so the candles would fit inside.

    I enjoy making various types of boxes and often I don't use a "template" but instead measure the width and depth of the item I want to put into the box then determine the size of the paper I need to use.  Sometimes all I need is an 8 1/2 x 11 sheet of cardstock and other times I need a 12 x 12 sheet of cardstock.

    Now, I've been promising a tutorial and I'm working on it for a basic box design.  I hope to post the tutorial early next week.  In the meantime, I hope you enjoy this box:


    Project Recipe:

    Ink:  Rose Red Classic (101778)

    Accessories:  1 1/4" Grosgrain Ribbon Pretty In Pink (119775), Full Heart XL Punch (119883), Jewelry Tax M Punch (117190), Glimmer Brads - Basics (121003)

    Cardstock:  Pink Pirouette (111351), Rose Red (102544)

    Designer Paper:  Patterns DSP Stack - Subtles (117152)

    Stamp Sets:  I{Heart} Hearts (w: 117010, c: 118571); Tiny Tags (w: 118091, c: 118592)

    I {Heart} Hearts
    Tiny Tags


    Sunny Stampin' & Scrappin'!

    Pam Staples